Posted on Leave a comment

The Importance of Warming Up in Figure Drawing

I need to warm-up for a little while before my efforts at figure drawing start to flow naturally.  During the initial warm-up period, I try to capture the general directional line of the model, and a few of the light and dark patterns, or perhaps some of the essential contours or textures.  Often it feels like I am drawing a stick figure, just trying to get the general angles and proportions correct.  I draw fast, because our warm-up drawings start with 30-second or 1-minute or two-minute poses.  The model often takes slightly off-balance or less comfortable poses during the warm-up period, knowing that he or she doesn’t have to hold them for long.  I find that effort on the part of the model inspiring, and it motivates me to try harder.  I usually use the broad side of a chalky medium for the warm-up drawings, sometimes even drawing with white nupastel, which helps me to see where the light is striking the model, though white alone usually doesn’t photograph well enough to post here in my blog.  I draw with minimal concern for accuracy, sometimes merely trying to switch gears, from the left-brained thinking about my day-job as I drove to the session, to the right-brain activity of figure drawing.  Drawing is first of all a physical activity, so like an athlete, an artist needs to work at it a little in order to coordinate the hand with the eye, and a period of warm-up drawings helps with that.

As you can see by the examples below, warm-up gestures have strange lines, curves going the wrong direction, places that get overdeveloped, and other places not drawn at all, wrong proportions, and yet an undeniable essence of the figure.  These are warm-up gestures of the same pose from this past week’s figure drawing session at Studio b:  one by me, one by Nancy Nichols Williams, and one by Steve Wagner.

Joan Vienot

Nancy Williams

Steve Wagner

I enjoy the time spent warming-up, but 2-minutes is always too short.  But then too, 5 minutes is too short, and so is 20 minutes, and come to think of it, rarely is a pose long enough for me to feel like I actually finished!  The next drawings include another of my warm-up gestures, and then two longer drawings, perhaps 20-minutes or 30 minutes.  I left early from this session, exhausted from teaching all day, the 2nd of a 2½ day crash-course that I teach at a nearby college, certifying swimming pool operators to meet health department requirements.

Most of my images are available for purchase.  Contact me if you are interested. — Joan Vienot

Posted on Leave a comment

Figure Drawing Starts With One Mark

I don’t have time for stage fright in figure drawing.  No performance anxiety allowed.  No worries about perfection.  No time to test the water, I have to just jump right in.  I start with warm-up sketches, timed one-minute gesture drawings.  I am drawing so fast and furiously that there is no time to be afraid.  I go through a lot of paper at the start of every session, knowing that every warm-up drawing will probably be thrown in the wastebasket when I get home.

It all starts with making the first mark on the paper, usually a broad gestural sweep showing the general directional line of the posed model’s position.  I like to use something soft, and light in value, a color which can be incorporated into my final drawing.  Soft chalk-like pastels are a little messy because they are so soft, so I use nupastel, which is a little harder, but not as hard as conte which is made of graphite mixed with clay.  I use conte sometimes, for my warm-ups, but with conte I am always risking permanent damage to my paper or my drawing by the unfortunate specks of hard material that are often in conte.  My favorite medium is very soft graphite, in a pencil.  But in my warm-up drawings, I sometimes never graduate from nupastel to graphite.  Instead the whole time is spent building shapes onto that first gestural directional line, correcting and re-correcting to get proportions and shapes more or less “right”.  The 5-minute warm-up drawing at right shows multiple corrections of the position of the left leg.

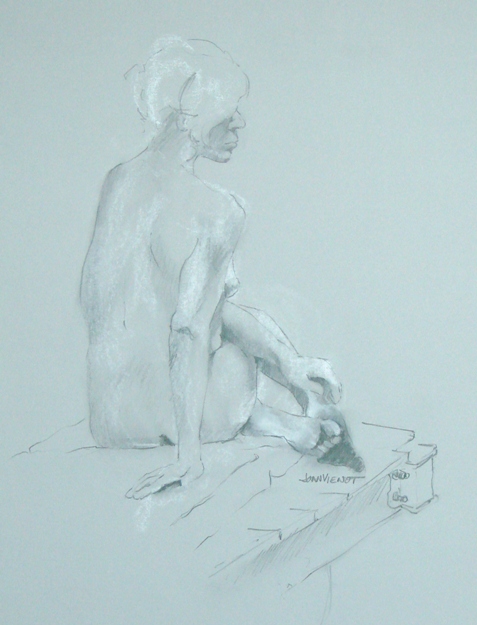
Below are my final 30-minute drawings for the evening.  I’m having fun drawing on paper that is lightly toned tan or gray, using white nupastel to make the highlighted areas stand out, and using graphite for the darks.  For the midtones I just let the paper show through.  I’ve been using my fingers to mush the media together in places, creating a softer texture.

We draw every Wednesday evening at Studio b. in Alys Beach.  Last night I had the pleasure of drawing beside accomplished artists Nancy Nichols Williams, David Orme-Johnson, Susan Alfieri, and Denielle Harmon.  I was exhausted, having taught all day at one of my other jobs, and then attending the opening of Donnelle Clark’s mixed media show in Rosemary Beach before coming to draw at Studio b.

Most of my images are available for purchase.  Contact me if you are interested. — Joan Vienot

Posted on Leave a comment

Drawing a Clothed Model

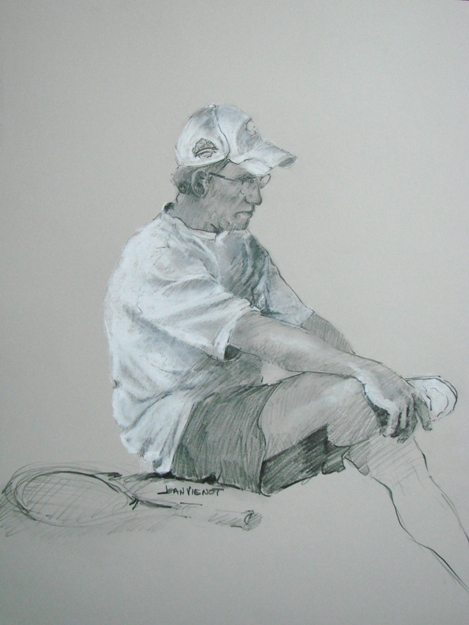
Figure drawing artists usually work exclusively from nude models.  But this week at Studio b., I had the good fortune of being the only artist.  So I had my choice.  Interestingly, the model had brought tennis gear, and was planning to use it in during the warm-up drawings — he thought we might like the added purposeful action.  So I asked him to wear the tennis clothes and keep the racket nearby for the entire session.

It’s so much easier drawing a clothed model.  I can draw the clothing with an extra wrinkle here or there and no one is the wiser.  You can’t do that with a nude figure without it becoming grotesque.

The model sat for me for 30 minutes for the drawing at left, and we took a short break, and then he sat for me for another 15 minutes.  I like this drawing.  I drew the white with Nupastel and the dark values with graphite, on gray Stonehenge.

The drawings below are two of the warm-up gestures, the second one obviously a longer pose than the first, and the third is the top part of the last drawing of the evening.

Most of my images are available for purchase.  Contact me if you are interested. — Joan Vienot

Posted on Leave a comment

Figure Drawing with Graphite-Wash

This past Wednesday during the figure drawing session at Studio b.,  I used conte and nupastel for my warm-up gestures, and graphite, CarbOthello pastels, watercolor pencils, and a graphite wash for my drawings.  I suppose if I stuck to one medium, I would develop more expertise in handling it, but I love making different kinds of marks using different media.

If I am purposefully drawing, then I will slow down and try to be a better craftsman, being more meticulous with whatever medium I have chosen, perhaps even making a few practice drawings of the subject or pose.  But figure drawing almost always demands a hurried pace.

June is the busiest month of the year for my pool service business, so this week I was just using the figure drawing session as a meditative exercise resulting in wonderful stress release.  For 2½ hours, I had no emergencies to respond to, no anxious customers, no mechanical failures to deal with.  Even as difficult as figure drawing is, the process brings on an exhilaration, a euphoria, a feeling of power and connectedness.  I am sure the challenge of the difficulty helps make it  so satisfying, the requirement of absolute concentration and focus.  But mostly it is the sheer joy of expression that I love, the creation of form and feeling through marks on a paper.

Most of my images are available for purchase.  Contact me if you are interested. — Joan Vienot

Posted on Leave a comment

The Bare Bones of Figure Drawing

Heather Clements taught a 4-hour figure drawing workshop at Studio b. Saturday afternoon.  She used slides to show us where the underlying skeletal structure and muscular anatomy were evident in paintings and sculptures by such artists as Rubens, Michelangelo, daVinci, Philip Perlstein, Picasso, Egon Schiele, and others.  She also gave us  a packet of photos and drawings of the skeletal and muscular anatomy to study and use as a reference.

Our initial assignment was to try to imagine the skeleton underneath the model’s pose and to draw that skeletal pose.  It was a hard job.  When I attended the University of Northern Colorado, I studied anatomy, not for my Fine Arts major, but for my other major, Health, Physical Education and Recreation.  But that was many years ago, and I have forgotten most of it.  So I just copied what Heather had shown us, as best I could.  I was impressed with how quickly it began to make sense, and I began to feel very comfortable with it.  Below is the progression of some of my warm-up skeleton gestures, with the last one showing the fleshy form added during in the final 30 seconds of an 8-minute pose, after the imaginary skeleton was already drawn.

This turned out to be an immensely helpful exercise, as I found it much easier to locate the various parts of the figure in relation to each other later on in the session.  But rarely do things ever go quite the way I wish they would when I am developing a new awareness, and I complicated things further by trying out some colored conte that I had been carrying around for about half a year in my box of drawing media.  I’ll probably get up the nerve to try the conte again, but I know for sure that I will be getting out my anatomy books and studying the skeletal structure of various poses.  Below are my two final drawings from today’s workshop.

Posted on Leave a comment

Figure Drawing with Pencil Wash

Watercolor Pencil Wash, 5 x 7

I rarely use color to show “local color”, that is, the actual color of the model’s skin and hair.  I have more fun when I draw light and shadow.  But this week the model at Studio b. wore a red slip that caught the light in exquisite ways.  Red just demands to be noticed.

I warmed up with nupastel and conte, switching to watercolor pencils and washable graphite on hot press watercolor paper.  Hot press is very smooth paper.  Wet color pushes around on it very easily, since there is no texture to catch onto the pigment.

It was a fun night, with a new model.  She gave us many challenging poses, especially when we were warming up.  Usually our models are fully nude, because only by drawing the nude do you get practice in seeing how the whole figure is put together.  I think all my practice has made drawing a clothed model easier.  It was easier to “see” the form beneath the clothes.

Posted on Leave a comment

Guest Artist at Studio b: David Orme-Johnson

David Orme-Johnson
Drawn with both hands by local artist David Orme-Johnson

David Orme-Johnson has been regularly attending the weekly figure drawing sessions at Studio bColleen invited him to be our guest artist this week.  David showed us a number of drawings in which he had done most of the drawing using both hands simultaneously.  In the later stages of each drawing, he executes the details just using one hand.  His website contains other examples along with galleries of his other work.  He talked about the process and the fun he has had since discovering that although he is right-handed, he can draw ambidextrously, and can even write script backwards.

Our model was unable to make it, so the artists took turns sitting as model for 5 or 10 minute poses (clothed).  I think all artists who work from models should be made to model now and then, to maintain their appreciation.  Modeling can be excruciating if you are not balanced well or if you are holding a slightly unusual position.  For my first seated pose, I looked up towards the ceiling.  My neck was starting to spasm after only 2½ minutes.  (I see why our experienced models never look at the ceiling.)

Drawing With Both Hands

I tried drawing with both hands like David, but I confused myself before I even started.  I wanted to draw the model and draw the mirror image at the same time, which would have created a symmetrical drawing of two women seated, facing away from each other.  The model was facing left.  If I had been watching my left hand, and making my right hand just do the same thing but backwards, I think I might have had some success.  Instead,  I was trying to translate the model’s pose into its reverse in my mind, and draw that reverse pose with my right hand, while my left hand tried to copy my right hand.  Pretty soon I didn’t know which direction either hand should go.  I wasn’t very happy with my drawing, but I think I could practice and become better at it.  (Click on picture at right for larger view.)

Ellen the ArtistFor the remainder of the class I enjoyed quickly sketching each artist as they took their turn posing.  Weekly figure drawing has helped me to be able to get the basic body position drawn in a hurry.  The problem is that some artists don’t just wear T-shirts and shorts like normal people.  Instead they wear funky clothes and accessories that are a visual feast, so each pose ended way too soon, before I could start playing with the fabrics and textures.  Following are a couple of my sketches from that session.  I worked with either graphite or tinted graphite on 18″ x 24″ manilla.  I sketched the gesture with white conte first. Artist Relaxing

Posted on Leave a comment

Drawing in Reverse

Figure Study

This week at the figure drawing session at  Studio b, instructor Heather Clements suggested that we draw the mirror image of the subject.  This required us to transpose the figure in our minds, because we didn’t actually use mirrors.  As usual, we drew a number of warm-up gesture drawings, and then some longer poses.

Somewhere along the way, I stopped drawing the mirror image — I’m sure it was a valuable exercise, but the process was boggling my mind.   So to continue along the vein of thinking in reverse, I decided to reverse my procedure.  I usually draw the shadows to define the form.   Instead on this final pose, I drew only the lighted areas, using nearly-white Nupastel on gray paper.  At the end, I used a little black Conte to define the form, leaving the gray paper to show through for the midtones.